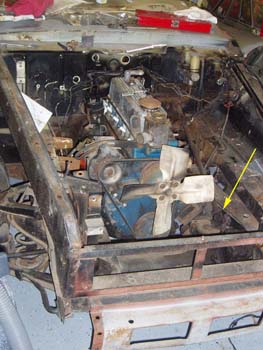
Steering Joint (2 Nov 2006)
Since I have the interior stripped I went ahead and started all the preparations to remove the body. The Roadster has 14 bolts (7 up each side) that secure the body to the frame. You also have lots of small things to disconnect like ground straps, wires, emergency brake, fuel and brake lines, tach and speedo, and the steering column. I'm pulling the whole steering rod for cleaning and resto. The steering joint (yellow arrow) on my car was old and crust covered, and the needle bearings in the cups were DRY. Once the joint was disconnected a few bolts at the firewall were removed and the entire rod pulled out as one piece.
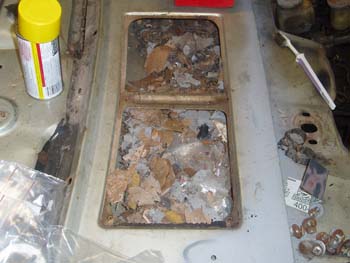
Rats Nest! (2 Nov 2006)
Well I found where the car cover went. The little rodent who took up residence in my car had been chewing up the foam and car cover and running up the vents into the fresh air intake area. The entire cavity was filled from side to side. It was truly amazing to see the volume of stuff that creature had stuffed into that little area.
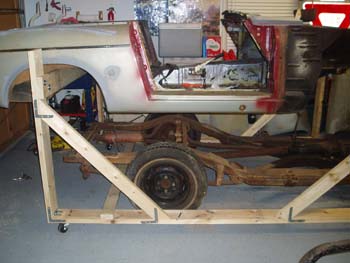
Body Lifted (3 Nov 2006)
Well I had a friend come over and we lifted the body off and placed it on the dolly constructed from the drawing on Mark Sedlack's site. Conner's mydatsunroadster.com site has info on the dolly as well. The 7 bolts up each side I mentioned are located at the arrows. Be careful when removing the bolts as you will need the body clips for future use. I bought bolts packs from Pat Mahoney (311s.org), but I'm still marking and saving all hardware for easy identification when it comes time to reassemble.
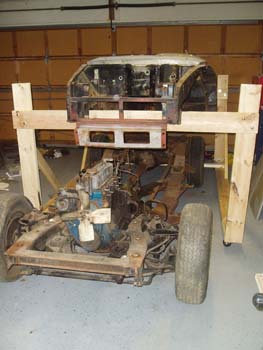
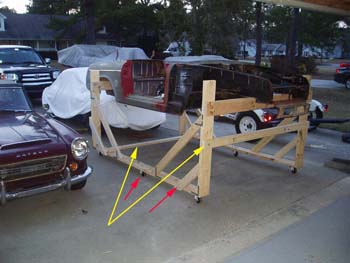
Body Dolly (3 Nov 2006)
Many of the sites that have covered a body off resto suggest bracing the door openings when lifting the body to avoid "twisting" or bending the body. I didn't brace the doors, but I did use a few people and each balanced a corner as we lifted the center with a cherry picker, chained from the e brake bolts to the roll bar bolts. (view 1)
Body Dolly (3 Nov 2006)
Many of the sites that have covered a body off resto suggest bracing the door openings when lifting the body to avoid "twisting" or bending the body. I didn't brace the doors, but I did use a few people and each balanced a corner as we lifted the center with a cherry picker, chained from the e brake bolts to the roll bar bolts. (view 2)
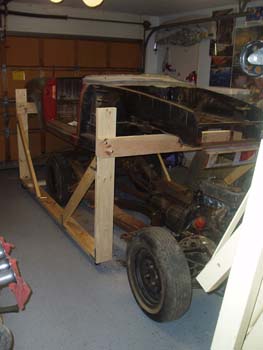
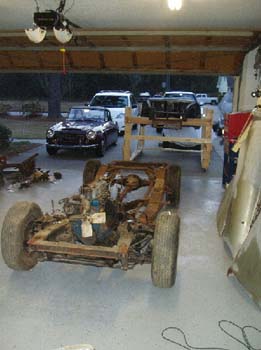
Separation! (3 Nov 2006)
By the end of the day I was able to roll the body outside for the first time and clean up around the frame. I had looked at Mark Sedlacks drawing to build the dolly, but in the photos he seemed to use only one brace. I had to add the extra braces in the drawing and additional cross boards, plus I added a center wheel...I probably went overboard with all of the bracing, but the dolly is solid and it's a one man operation to push it around. That is my 67 Daily driver in the background. (view 1)
Separation! (3 Nov 2006)
By the end of the day I was able to roll the body outside for the first time and clean up around the frame. I had looked at Mark Sedlacks drawing to build the dolly, but in the photos he seemed to use only one brace. I had to add the extra braces in the drawing and additional cross boards, plus I added a center wheel...I probably went overboard with all of the bracing, but the dolly is solid and it's a one man operation to push it around. That is my 67 Daily driver in the background. (view 2)
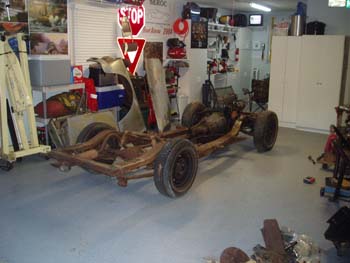
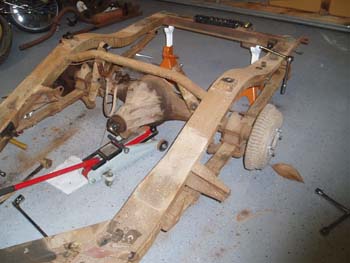
Chassis Alone (13 Nov 2006)
Well it's time to get started with stripping the frame. The engine and transmission will come out first and then I will carefully tag and record all of the wires and fittings, and finish up by removing all of the suspension pieces.
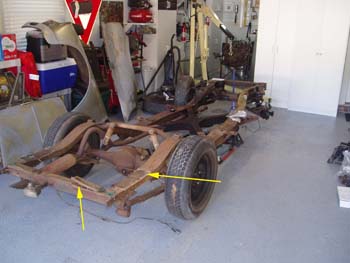
Frame Pads (15 Nov 2006)
Well the engine was easy to pull since nothing was in the way, so I decided to press forward pulling pieces. One note: ensure you make a drawing to let yourself know where all of the frame pads (yellow arrows) are installed. The horsehair pads provide dampening between the body and frame, but were notorious for holding water. Many owners use foam compression mats or rubber as replacements.
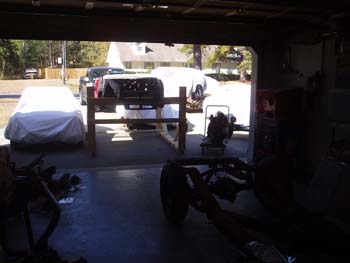
1600 Away! (15 Nov 2006)
This is a horrible picture, but that is the old 1600 on the roll away dolly (to the right of the body). This is the general idea for using the body dolly, simply roll the body out of the way while you work, and roll it back over the frame for storage.
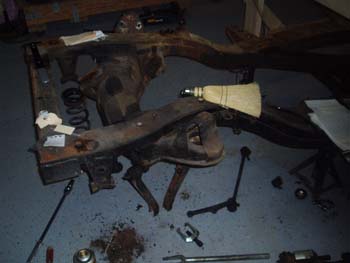
Front End Tear Down (28 Nov 2006)
Well it’s been a few weeks and it's time to dig into the front end. I sprayed most of the bolts with a good shot of PB Blaster and went to work tearing things down, even though I have a book with the suspension drawing, I made my own notes and drawings...this allowed me to number the bolt bags for future reference. Finally I had to buy a large 34mm socket for the bottom A arm bushings, that and my breaker bar finally did the trick.
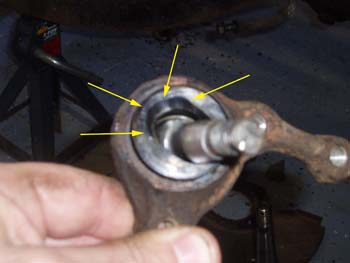
Ball Joint Wear (28 Nov 2006)
The picture tells the story...the ball joints on the Roadster take a beating and this wear is not uncommon on a car that's not cared for. The ball joints get very pricey, a member on 311s.org had some made, eventually when I get to this point I will obviously have to source these parts.
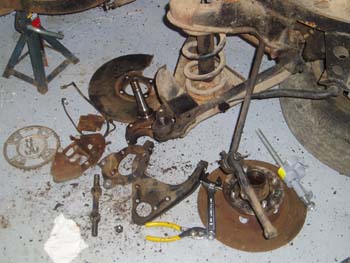
Front End Almost Done (28 Nov 2006)
Well after drawing every thing for the other side this side went a little smoother. I also got better with the ball joint separators and the pickle fork...boy will a 40 year old ball joint POP when it finally separates. I removed the spring perch isolator pad from inside the frame assembly; these will be replaced with modern components later.
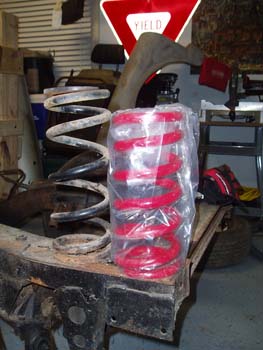
Comp Springs (28 Nov 2006)
Since I had bought comp springs for the rear a long time ago, I decided to purchase the Mike Young comp springs to balance the cars ride height back out some. The original spring is on the left...I went with red since the car will be black with a red interior. I figured little splashes of red around the car would look OK. There are many models of lowered springs out there and many debates of the merit of each...the main complaint is the stiff ride, but I'm OK with that for now as long as the ride height comes out as I imagined.
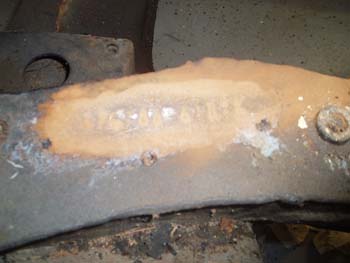
Frame VIN (29 Nov 2006)
The VIN number is stamped in the frame on the driver’s side down rail. The location is accessible in the engine compartment, but the area seems to get covered with junk so it takes a little effort to actually see the numbers.
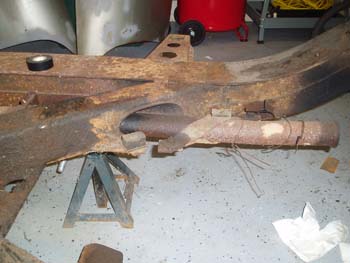
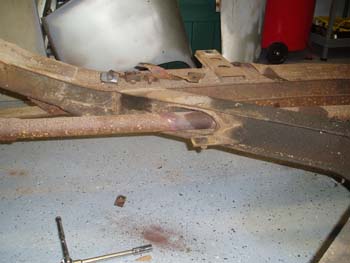
Exhaust Front (29 Nov 2006)
I'm taking photos of the exhaust so it will be easier to have the new exhaust copied while the body is off. The front section has a two piece hanger (which is broken). The rubber isolators seemed to be bonded to the metal back in the day. I will look for a modern replacement or buy an isolator that is threaded on two ends and drill new holes in the bracket. The oval in the frame is the limiting factor on the exhaust size. Some have altered their frame while they were at this point to allow a larger pipe.
Exhaust Center (29 Nov 2006)
As you can see, with the first turn of the wrench the middle hanger separated from the isolator pad. I think finding universal exhaust hangers will not be as hard as other pieces I've tried to source.
Exhaust Rear (29 Nov 2006)
This is probably the most important photo for the exhaust shop to reference from. I need them to be able to create the bend over the axle, but stay below the height of the frame to avoid rubbing on the body tub.
Exhaust Top (29 Nov 2006)
This is a shot from the rear of the frame. I plan to have the new exhaust put in prior to dropping the body back on (that is only the plan for now)...I will have to see how things are looking later down the road.
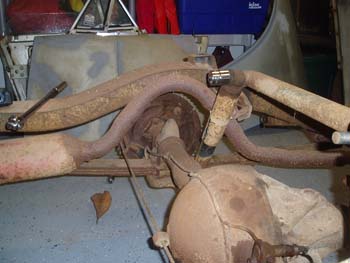
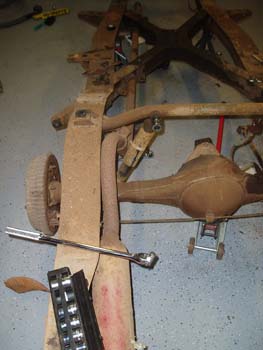
Rear Axle (29 Nov 2006)
I jacked the rear axle up to take the weight of the axle and started to pull the shackle bolts. I have new comp springs and shocks for the rear, and I plan to pull the axles out and replace the bearings and collars. More to follow on that.